Organizations have been reluctant to embrace Google+ as part of their nonprofit marketing mix and for good reason. While many people still consider it a ghost town, others hold the wishy-washy statistics of 300+ million monthly active users with great skepticism. The benefits far outweigh the cons for the ad-free platform. You will start to see more and more people – especially millennials – migrate to Google+ from Facebook. But only once they understand the full features of the social platform.
It is my hope that you’ve established a sound social media strategy that coincides with your organization’s mission and available resources. It’s ok for your nonprofit storytelling to be about your achievements and impact. Just don’t forget to curate content from other relevant sources too.
BlackBaud’s report asserts that, “92% of nonprofit professionals use content marketing” to build trust. They also rely on it for donor acquisition and retention. Your content plays a big role in helping you to fulfill your mission.
Google+ is the 5th most used social media channel for nonprofit content distribution and quickly on the rise. Be thoughtful about how you’d integrate Google+ into your existing structures. Especially after creating a new Profile, Page, and Community.
I’d like to provide a framework for best practices any nonprofit can adopt. Let’s look at the various elements necessary to make your time on Google+ well spent.

From Gmail to Personal Profile to Nonprofit Page
On Google+ – as in life – you must crawl, before you can walk, before you can run.
It all begins with a free Gmail account, which enables your personal Google+ profile. In my quest for nonprofit capacity building and digital literacy, I implore you stop the slow crawl and walk into a new realm of technology. The media rich features on Google+ will enhance your communications strategy and have you running way ahead of the pack.
Google+ is a Human Platform
Create a full personal profile on Google+ to establish your voice and present yourself as a subject matter expert. It allows like-minded people to support your cause and nonprofit mission. Even when you’re not online.
So go ahead. Don’t be shy.
Upload a profile picture, cover photo, and fill in some details about yourself. Be sure to add some links to your other social accounts and websites. Contact information is always good too. Keep it light and fresh and most of all, let your personality shine.
Remember, this will be the first opportunity you have to introduce yourself and your nonprofit. So you’ll want to make a great first impression. Set your privacy settings to allow other plussers to send you a message without revealing your email address. This is good for direct engagement and you can always block any undesirables.
Here’s a quick video from Google+ to get you started with your profile:
If you’re new to Google+, spend some time familiarizing yourself with the user interface. Google has done a great job of keeping the design and layout simple and clean.
Google+ Page for Nonprofits
So you’ve established your personal profile. Great! Create a Google+ Page for your organization to maximize your exposure and build authority. Hover your mouse over “Home” (top left) to expand the Google+ main navigation menu. Click on Pages and follow the onscreen instructions.
Check out this handy Slideshare for the play-by-play:
You can toggle between your personal profile and nonprofit page by clicking on your profile image (upper-right corner) and selecting your organization’s logo. In either case, you can share various types of media; plain text, static images, animated GIFs, videos, and/or links with each post. Sharing your content “publicly” allows your posts to be found within Google search. I tend to share things publicly using my personal profile, then reshare my own content as my Page within a Community (or vice-versa).
At some point, you’ll want ensure that you’ve linked your website to your nonprofit page. It gives you that verified checkmark from Google. This small action authenticates your Page among the masses. When coupled with great content, it makes your page a catalyst for telling your story. Google Authorship and advance search features will do the rest.
What’s In Your Google+ Toolbox?
Be tactful about your approach. Create a unique engagement strategy on Google+ that speaks right to your audience. Make them aware of your message. I suggest sharing content outside of your own – as both yourself and your page. You’ll need to align your content marketing plan with an editorial calendar. Especially when working with a digital communications team. It keeps everyone on the same page, allows you to plan ahead for resource allocation, and no one needs to wonder what’s next.
I recommend using Buffer to schedule your posts onto your new Google+ Page. They give you up to 10 free posts for scheduling your content. You can only schedule sharing to your Page for now, but you can install a free browser extension for Chrome called Do Share. It allows you to do the same thing as Buffer with the added convenience of scheduling content to your personal Google+ Profile. I will warn you that sometimes it’s buggy and the app is unsupported, but otherwise a great tool.
It’s well known that the best time to post on Google+ is between 9-11am for heightened engagement on your content. In reality, this will differ for everyone. Depending on what you’re sharing, the type of media used, your Google+ formatting style, and the list goes on. Two posts per day between 8am-3pm Monday-Friday is a great way to get the ball rolling. I suggest experimenting with different times of the day between your Profile and Page as you build your following. Once you’ve created enough historical data, use Timing+ to determine the best moments for optimal engagement. Then schedule Buffer and/or Do Share as needed.
The best thing you can do on Google+ to achieve success is to be responsive. If someone takes the time out to comment on your post – good or bad – take the time to provide an objective reply. +1’s are the same as Likes on Facebook. When someone +mentions you in their post or reshares your content, it deserves a bit of gratitude. Google+ will notify you when any of these forms of engagement occur. You can use another browser extension called CircleCount to track ripples and other stats. Ripples is also a native feature of Google+. You can find it by clicking on the dropdown menu in the upper right hand corner of your post.

Google+ Communities For Nonprofits
Since its release on December 6, 2012, Google+ Communities has been available to the public. Enabling anyone to create a topic-specific destination on the Internet for any interest you can think of.
Building relationships in the social media sphere is important. Engage in discussions and offer your wisdom to help others. Google+ Communities allows visceral engagement with other plussers who share your particular interests. Creating and sharing quality content within Google+ Communities allows you to increase your visibility. Attracting supporters to your cause. Each time you do so is a branding opportunity for you and your nonprofit’s logo.
Anyone can create a Google+ Community. Nurturing its growth, productivity, and purpose is altogether a hefty task. I recommend participating in existing communities before starting your own. Because running one is no easy feat. Doing so allows you to get a feel for the marketplace to determine how you can add unique value on popular subjects shared by many.
Keep in mind that every community has a different code of conduct – or so they should. They tend to describe the rules for engagement and provide posting guidelines for members to follow. Spend some time discovering a community’s policies before engaging. This will ensure your posts are not removed or worse yet – get yourself banned.
Private or Public Google+ Community?
If you decide to create your own community, you have to determine whether it will be private or public. Only certain privacy configuration will provide any SEO value. Establish both your Profile and your Page as the ‘owners’. So that you can provide proper administration depending on which profile you’re toggled into. You’ll have to join the community as your Page and wait two weeks before being able to assign more owners, but that’s ok. You have plenty of other things to do in the meantime.
Hover your mouse over “Home” (top left) to expand the Google+ main navigation menu as we did earlier to create the nonprofit G+ Page. When you see a list of options, click on Communities then Create Community.
The purpose of your community is synonymous with your decision to make it public or private. Each with its own set of options and parameters. Here is a chart explaining the differences from Google.
| Community | Who can join | See posts & members | Find community via search |
| Public – Anyone can join | Everyone | Everyone | Everyone |
| Public – Moderator approval | Request to join, approved membership | Everyone | Everyone |
| Private – Find via search | Request to join, approved membership | Members | Everyone |
| Private – Hide from searches | Only invited people | Members | Not search results |
Select “no, anyone can join” OR “yes, anyone can ask to join” depending on what your particular needs are.
Whichever way you go, follow the same fundamentals from when you created a G+ Profile and nonprofit Page. Be sure to come up with a great name for your community. Use keywords related to your nonprofit niche since it’s indexed in search depending on your settings. Google+ support says,
“A community’s privacy settings currently can’t be changed once it’s been created. Please pick your desired setting from the start.”
Google+ Community Structure & Personality
Be prepared to start giving your new Google+ Community some structure and personality. With a great Community Name, you’ll need a brief Tagline and Avatar to associate with your community. Social Media 4 Good uses a free license image with the #SM4GOOD hashtag for universal branding. Create some Categories, provide a description for About this Community, and share some social media Links or internal pages.

Populate your Categories with content, especially within Community Guidelines. Each of the categories you’ve created should have some of your original content as well as relevant curated content. Your team should engage each others’ posts to kick things off.
Here are the essentials:
- Community Name
- Tagline
- Community Avatar
- Categories
- About This Community
- Community Links
Click Options (red circle) to edit these areas.
Nurturing Your Google+ Community for Growth
Assigning community moderators is crucial for the success of any community. After all, “No man is an island, entire of itself.” Google+ does a pretty good job of detecting spam, but moderation doesn’t end there. Your team will have to keep an eye out for repeat posts, conduct unbecoming, unscrupulous link dumping, and anything else that does not conform to your community policy.
Such incidents are dealt with swiftly within any properly moderated community. You and your team of moderators must set and maintain the standards of the community to make it a thriving environment for learning and discussion.
Keep Your Community Organized
Categories within your community are an extremely useful feature since it maintains your topics into neat segments of the primary interest. Google+ allows a total of twenty.
Let’s face it. People don’t always categorize their posts into the appropriate categories you’ve clearly created for your community. Luckily, Google+ allows moderators to fix that in a couple of seconds by hovering your mouse over the existing category (within the post) and simply selecting the correct one from the list. voila!
Posting Style
Treat each of your posts as a mini-blog, taking the time to use Google+ formatting to create a bold post title, provide a description about what someone can expect to find when clicking the link and feel free to use a nice image to increase your click-through rate. Highly plussed, shared, and engaged content increases your social signals and gives your website great link juice. Lead by example!
Google+ Hangouts
Hosting Google+ Hangouts with your constituents is a great feature. Enabling free video conferencing for your interviews, board member meetings, or just to get your fundraising ambassadors pumped up right before a big campaign launch. HOA (Hangouts On Air) will record a video of your hosted conference and automatically share it to your YouTube channel, which you can later use for your blog. Get creative!
Kickstart Your Entrance on Google+
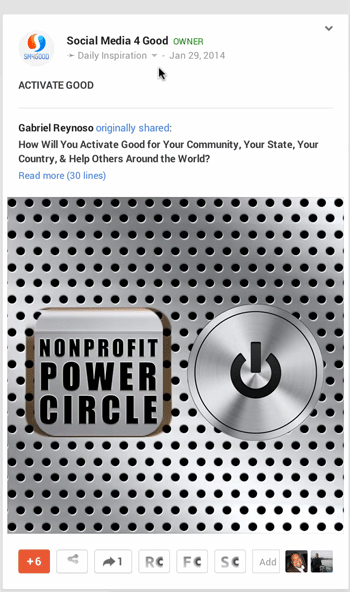
I welcome you to check out the Social Media 4 Good Community to ask questions, seek guidance, borrow ideas, and mingle with some of the best and brightest nonprofits and social media leaders from around the world. Feel free to add the Nonprofit Power Circle to begin acquainting yourself with other Do Gooders on a mission – just like you.
Did I miss anything? What are some of your best practices on Google+?